Configuring the ClickUp Tool
Introduction
The ClickUp tool is a powerful feature that allows users to integrate and interact with ClickUp project management platform within Wabee AI. This guide will walk you through the process of configuring the ClickUp tool, enabling you to connect your ClickUp workspace and leverage its capabilities for task management and collaboration.
Prerequisites
Before configuring the ClickUp tool, ensure you have the following:
- Access to the Wabee tool management dashboard
- ClickUp account with appropriate permissions
- ClickUp API Key (generated from your ClickUp account settings) - Learn how to get it in the official ClickUp documentation.
-
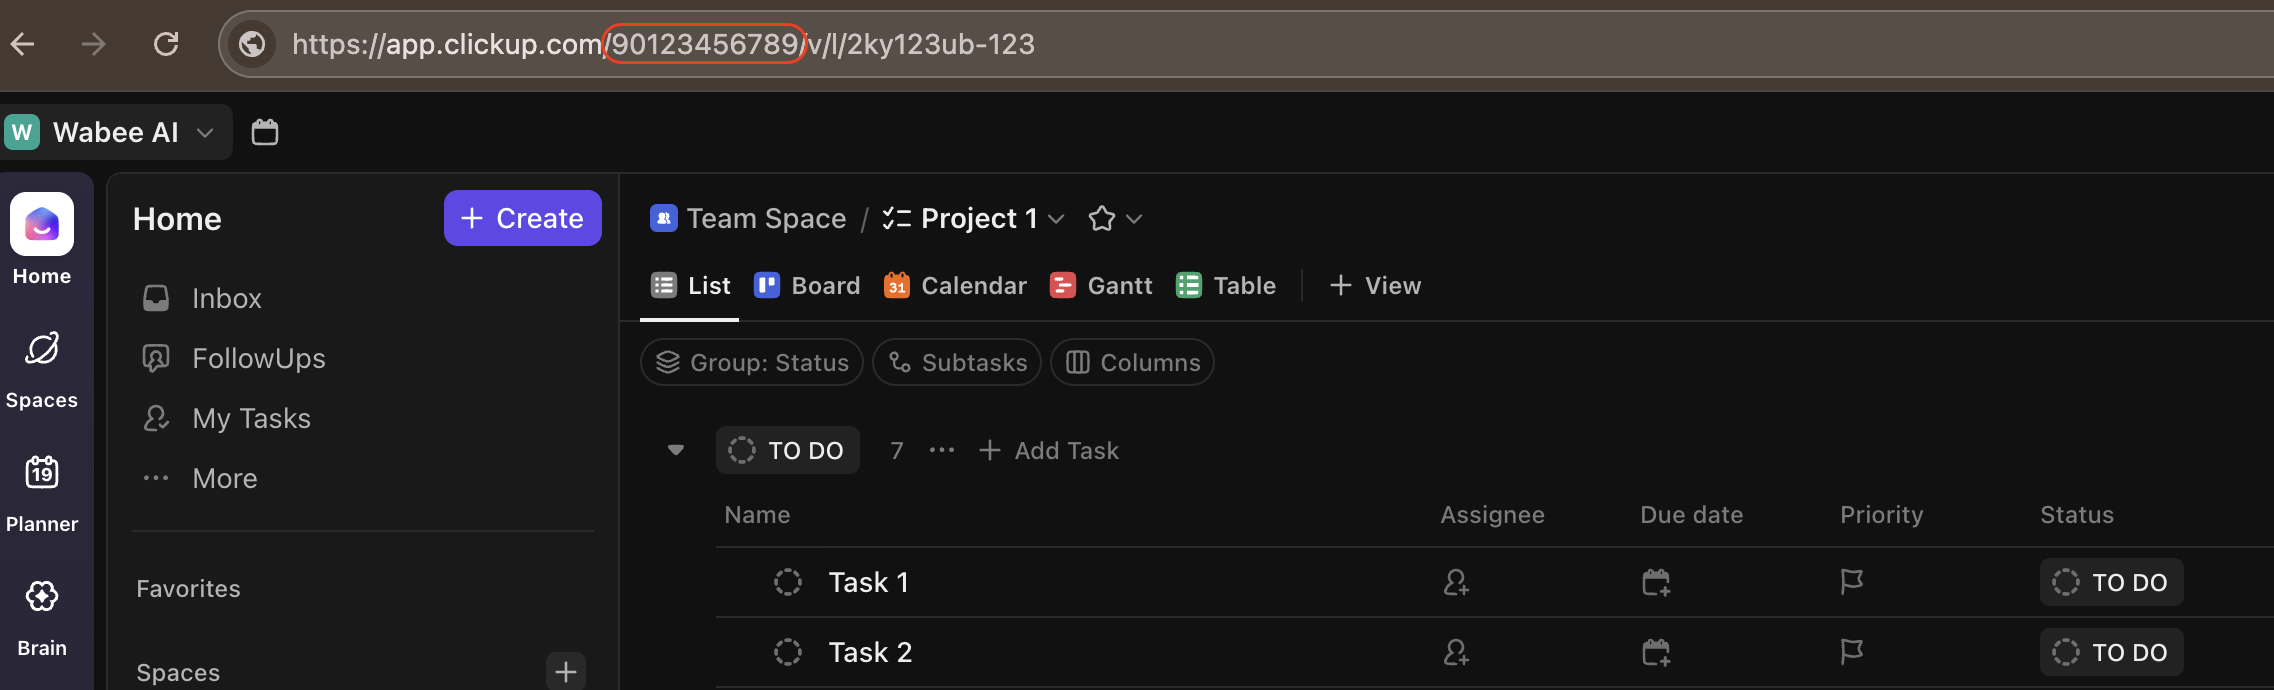
ClickUp Team ID (workspace identifier). You can find this in the URL when logged into ClickUp or in your workspace settings. See image below.
Step-by-Step Configuration Process
-
Access the Tool Management Dashboard
- Log in to your account and navigate to the "Tools" section.
-
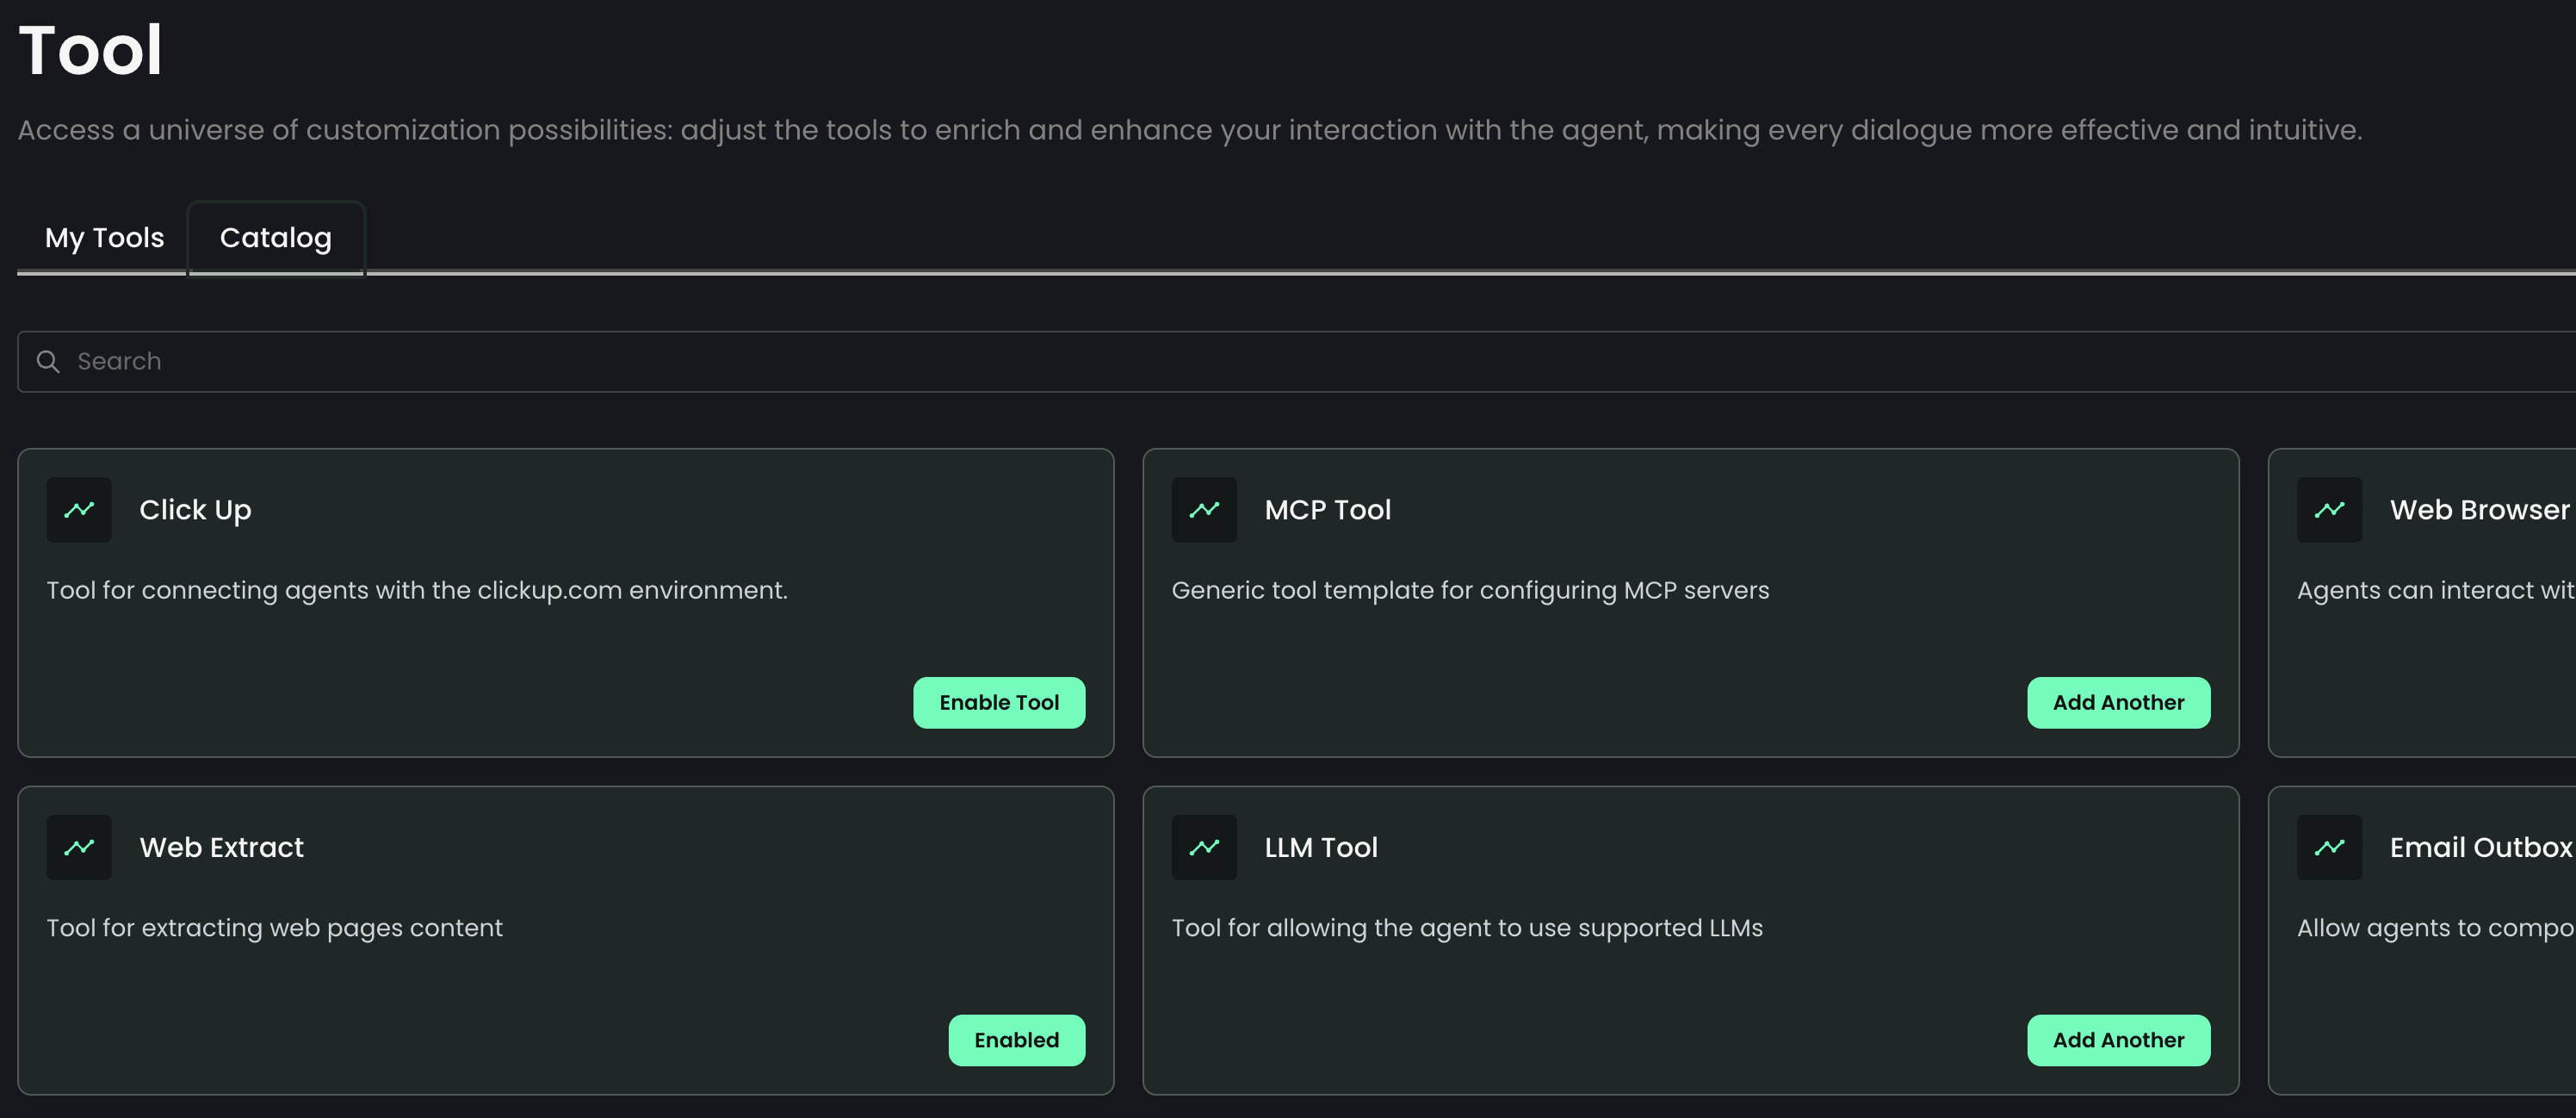
Click on the "Catalog" tab to view available tools.
-
Locate the ClickUp Tool
- In the tool management dashboard, you'll see various tool cards.
- Look for the "ClickUp" card or use the search to locate the tool.
-
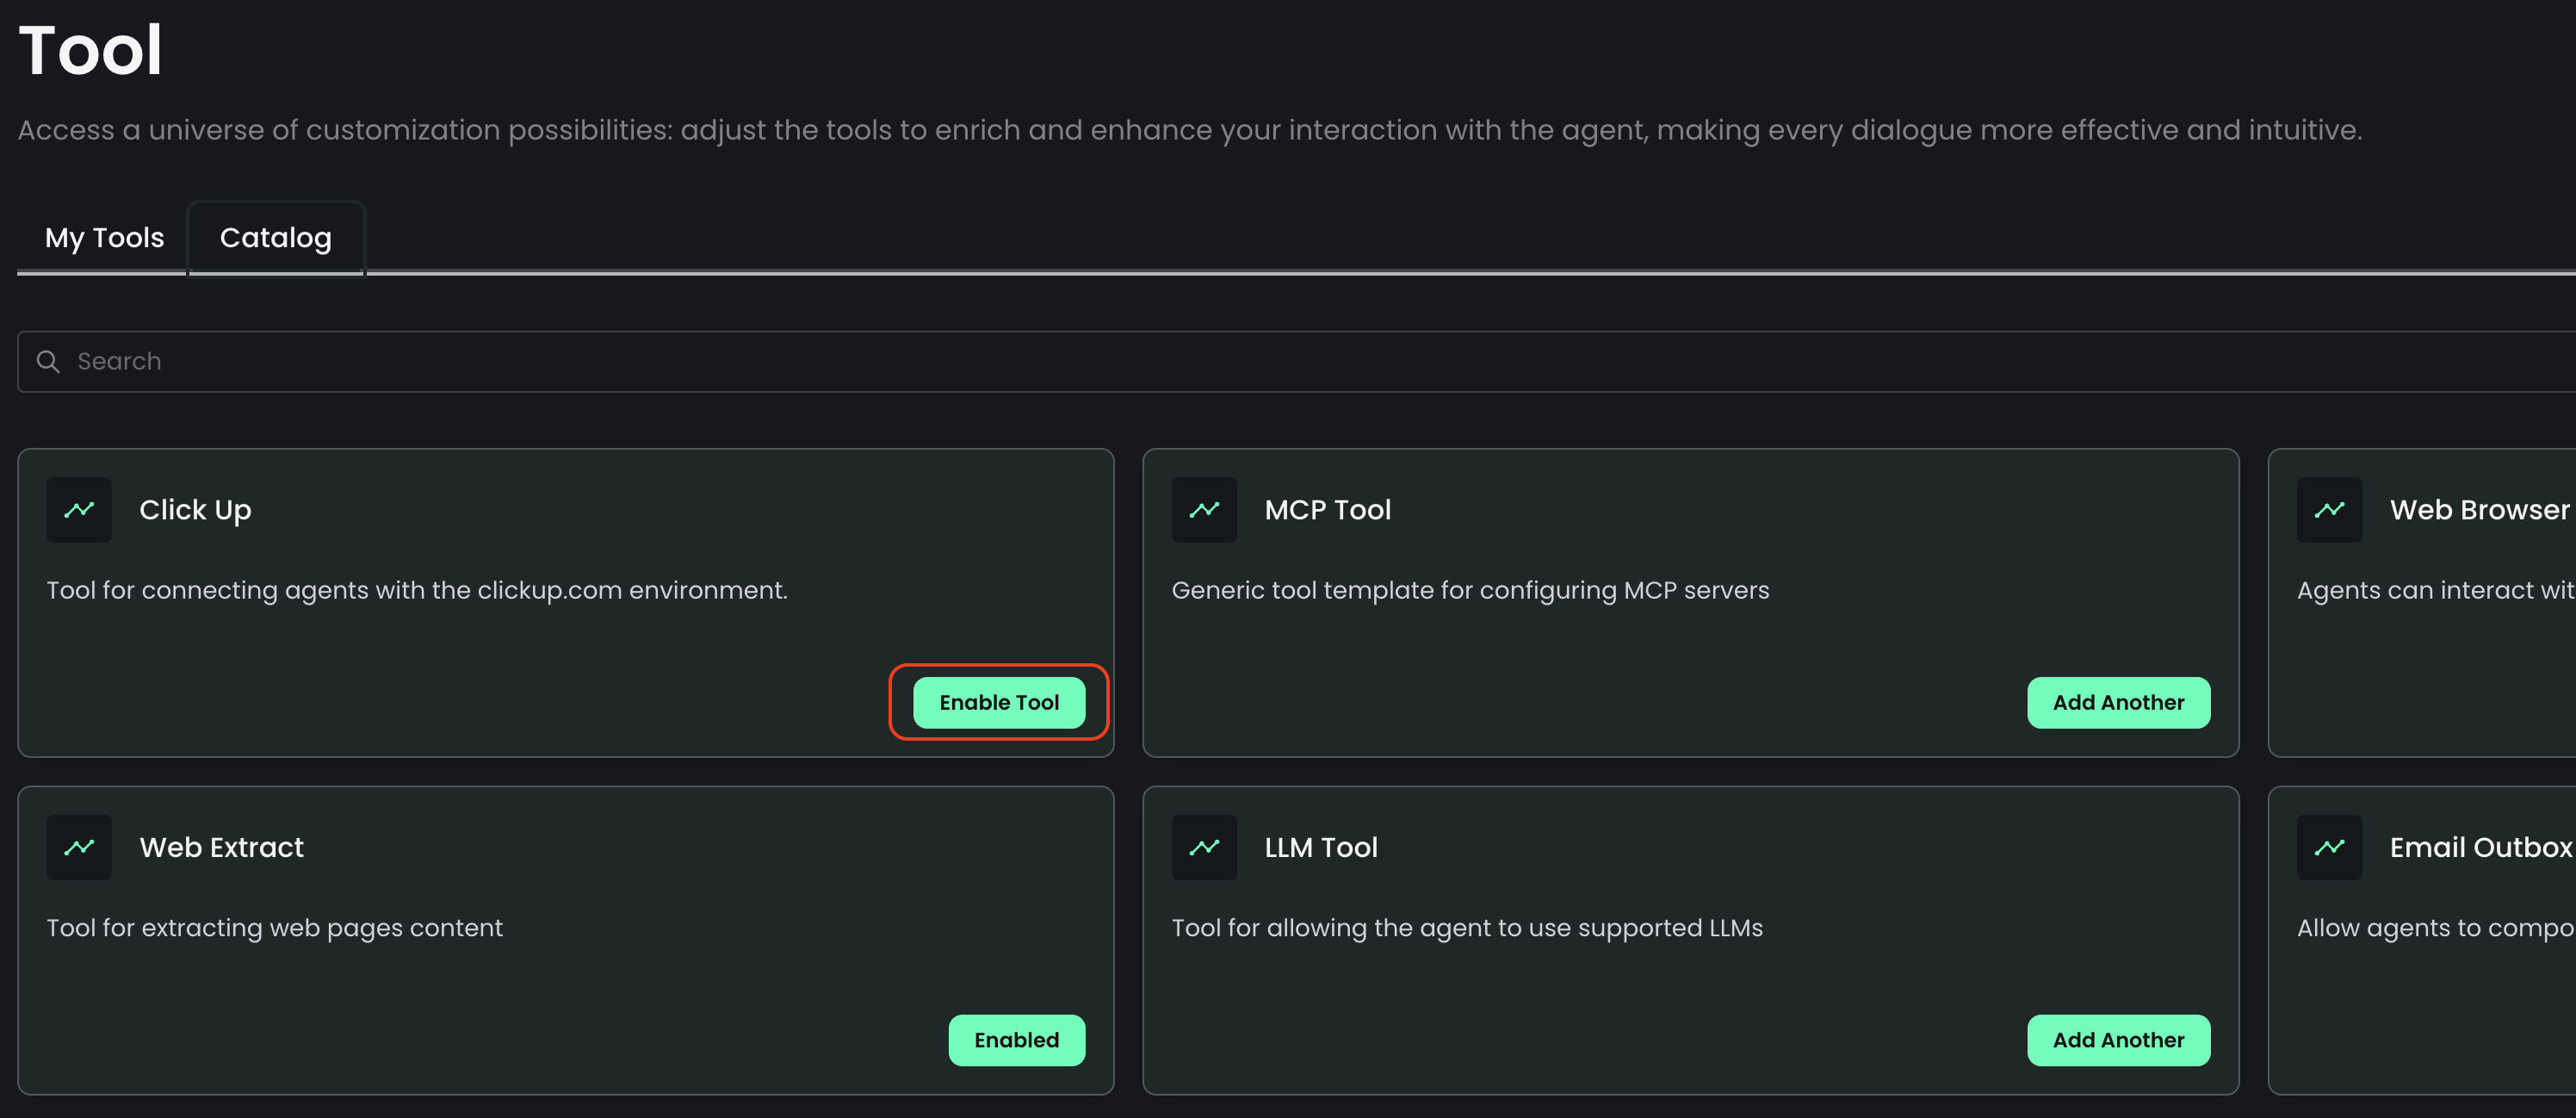
Initiate Tool Configuration
- Click the "Enable Tool" button on the ClickUp card to begin the setup process.
-
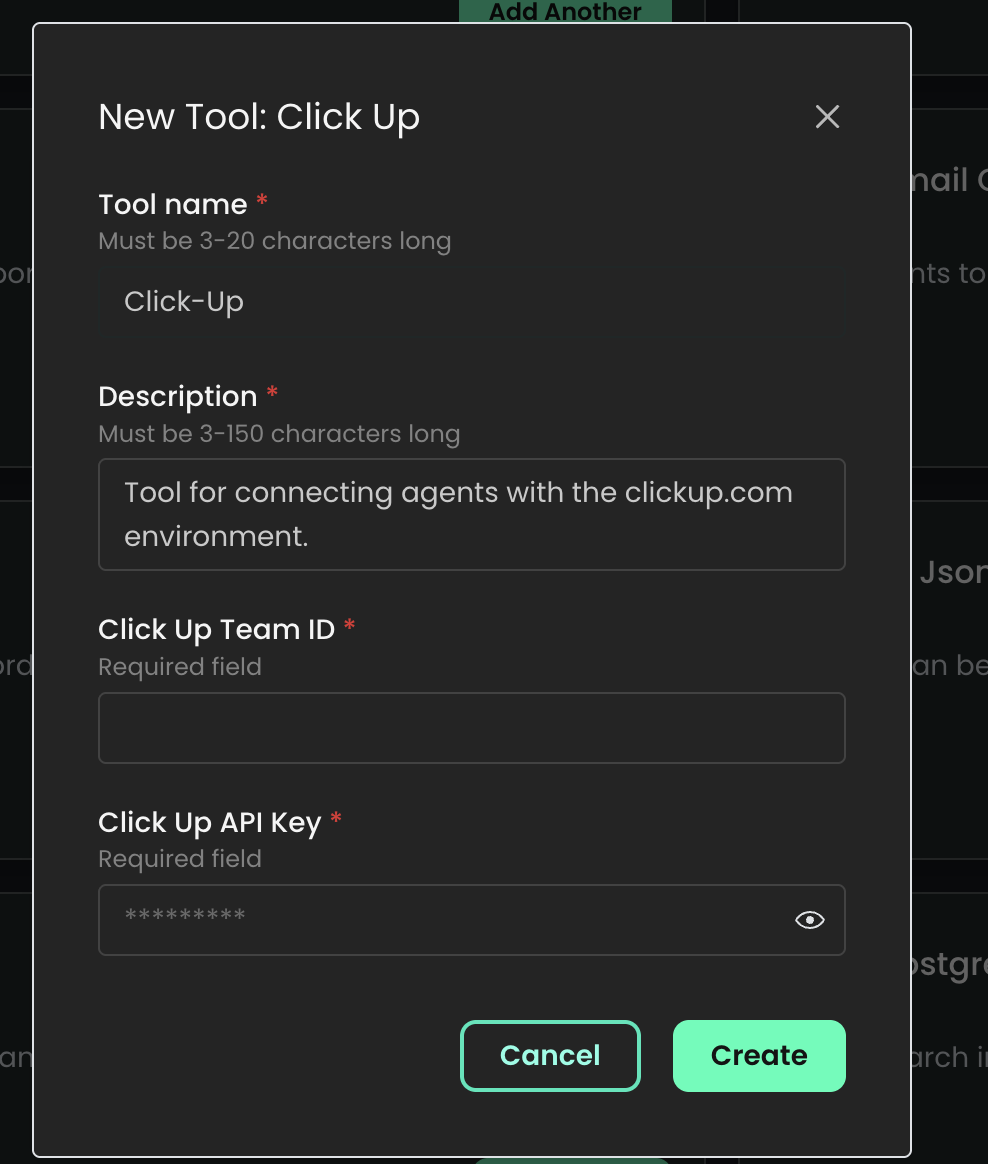
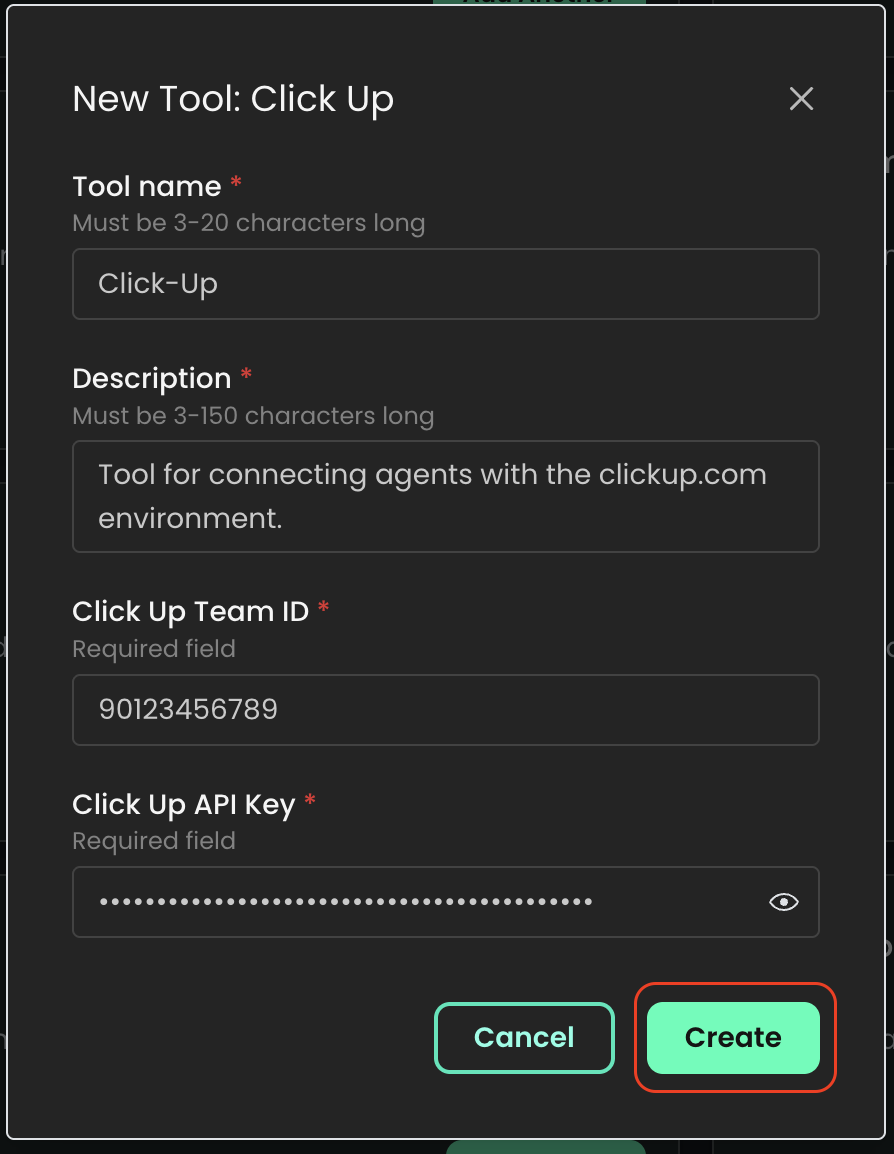
Fill in the Configuration Form
- Complete the following fields in the configuration form:
- Tool Name: By default, this is set to "Click-Up." You can keep this or customize it if needed (must be 3-20 characters).
- Description: A brief description of the tool's purpose. The default is "Tool for connecting agents with the clickup.com environment." You can modify this if desired (must be 3-150 characters).
- Click Up Team ID: Enter your ClickUp Team ID. This is a required field that identifies your ClickUp workspace.
-
Click Up API Key: Input your ClickUp API key. This is a required field for authentication.
Note: The API key field is masked for security. You can toggle visibility using the eye icon if needed.
- Complete the following fields in the configuration form:
-
Review and Submit
- Double-check all the entered information for accuracy.
-
Click the "Create" button at the bottom of the form to save your configuration.
How to Obtain Your ClickUp Credentials
Finding Your Team ID
- Log in to your ClickUp account
- Navigate to your workspace settings
- Your Team ID can be found in the URL:
https://app.clickup.com/{team_id}/... - Alternatively, go to Settings > Workspaces to view your Team ID
Generating an API Key
- Click on your profile avatar in the bottom left corner
- Click on "Settings"
- Select "Apps" from the lower-left menu
- Click on "Create new app"
- Input a name and a redirect URL (you can use
http://localhostif unsure, this field is not currently used for Wabee integration) - Click "Create App" to create a new API key
- Copy the generated key immediately (it won't be shown again)
Best Practices & Tips
-
Security:
- Never share your API key publicly or commit it to version control
- Regenerate your API key immediately if you suspect it has been compromised
- Use a dedicated API key for the Wabee integration that can be revoked if needed
-
Permissions:
- Ensure the user account associated with the API key has appropriate permissions in ClickUp
- Consider using a service account specifically for integrations
-
Team ID Verification:
- Double-check your Team ID before saving the configuration
- Using an incorrect Team ID will result in connection errors
-
API Rate Limits:
- Be aware of ClickUp's API rate limits (100 requests per minute for most endpoints)
- Configure your agents to respect these limits to avoid throttling
Troubleshooting
If you encounter issues while configuring or using the ClickUp tool:
-
Connection Errors:
- Verify that your API key is correct and hasn't expired
- Ensure the Team ID matches your ClickUp workspace
- Check if your ClickUp subscription level allows API access
-
Authentication Failed:
- Regenerate your API key in ClickUp settings
- Confirm the API key was copied completely without any extra spaces
- Verify that the user account is active and has appropriate permissions
-
Missing Data:
- Check if the API key has access to the specific ClickUp spaces and folders
- Ensure the user associated with the API key is a member of the relevant teams
-
Rate Limiting Issues:
- If you receive 429 errors, you're hitting rate limits
- Consider implementing request throttling in your agent configuration
Conclusion
By following these steps, you should now have successfully configured the ClickUp tool in your Wabee AI platform. This integration will allow your AI agents to efficiently manage tasks, access project information, and interact with your ClickUp workspace, enhancing your project management and collaboration capabilities.
For any additional assistance or advanced configurations, please consult our support team or refer to the ClickUp API documentation.